Welcome, Guest. Please login or register.
May 07, 2025, 03:51:33 PM

Login with username, password and session length

Recent Topics

by jed
[May 06, 2025, 04:22:23 PM]

[May 05, 2025, 09:12:01 AM]

[May 03, 2025, 06:39:16 PM]

by jed
[May 02, 2025, 09:57:11 AM]

[May 01, 2025, 05:53:19 PM]

[April 26, 2025, 04:27:54 PM]

[April 23, 2025, 11:10:07 AM]

by [WR]
[April 23, 2025, 09:15:13 AM]

[April 21, 2025, 10:44:08 AM]

[April 17, 2025, 04:48:17 PM]

[April 17, 2025, 08:45:02 AM]

by jed
[April 11, 2025, 01:03:22 PM]

[April 11, 2025, 06:19:31 AM]

[April 07, 2025, 07:03:34 AM]

[April 05, 2025, 08:50:20 PM]

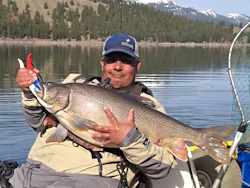
Picture Of The Month


Guess who's back?
jed with a spring Big Mack

Topic: So.....I've got this hole  (Read 5149 times)

0 Members and 1 Guest are viewing this topic.

Kenai_guy

  • Salmon
  • ******
  • It's not as fun if it's easy
  • Location: Kenai, AK
  • Date Registered: Jan 2012
  • Posts: 721
Its a 2 inch circle
No matter how many times the PB's tell me I'm nuts....I still smile every time I out fish them

9th place 2014 ORC
4th place 2014 Whiskey Gulch Yak Classic
1st fish ever entered & Day 1 Champion 2013 Whiskey Gulch Yak Classic


Noah

  • Sturgeon
  • *******
  • Cabby Strong!
  • Location: Tigard
  • Date Registered: Mar 2011
  • Posts: 3596
A soldering iron works pretty well too. I've heard of people using plastic milk jugs to fill a hole but haven't tried it myself.


jgrady

  • Lingcod
  • *****
  • Location: reedsport
  • Date Registered: Mar 2010
  • Posts: 290
If you get a 2.5in hole saw and cut 2 hole's in the side of a heavy plastic bucket and a 2 in hole saw cut 1 hole, then heat them in boiling water and let them cool with something heavy  on them ,so they stay flat, you can then use a small bolt/nut and washers to hold them together in place, as a sandwich patch in place and heat melt the edge's ,a hot glue gun works well for this when done remove bolt and fill little hole with hot glue or melted plastic.


SturgeonRod

  • Lingcod
  • *****
  • Location: Pittmeadows bc
  • Date Registered: Aug 2012
  • Posts: 378
If you get a 2.5in hole saw and cut 2 hole's in the side of a heavy plastic bucket and a 2 in hole saw cut 1 hole, then heat them in boiling water and let them cool with something heavy  on them ,so they stay flat, you can then use a small bolt/nut and washers to hold them together in place, as a sandwich patch in place and heat melt the edge's ,a hot glue gun works well for this when done remove bolt and fill little hole with hot glue or melted plastic.
That sounds fairly legit
-Rodney-


Kenai_guy

  • Salmon
  • ******
  • It's not as fun if it's easy
  • Location: Kenai, AK
  • Date Registered: Jan 2012
  • Posts: 721
What if I just found someone else's yellow Hobie to drill the hole in?  Do you think the same patch method would work?
No matter how many times the PB's tell me I'm nuts....I still smile every time I out fish them

9th place 2014 ORC
4th place 2014 Whiskey Gulch Yak Classic
1st fish ever entered & Day 1 Champion 2013 Whiskey Gulch Yak Classic


  • http://[img]http://www.northwestkayakanglers.com/gallery/806_15_12_09_4_03_17.jpeg[/img]
  • Location: Hilo, HI
  • Date Registered: Nov 2009
  • Posts: 100
What if I just found someone else's yellow Hobie to drill the hole in?  Do you think the same patch method would work?
Are there any kayak shops up your way? They will usually have extra plastic that you can get for free/cheap. Cut the patch a bit bigger than your hole, and use a heat gun to weld them together.


jgrady

  • Lingcod
  • *****
  • Location: reedsport
  • Date Registered: Mar 2010
  • Posts: 290
ROTFLMAO :laugh: yea that would do it..


SteveHawk

  • ORC
  • Salmon
  • *
  • Location: Portland, Oregon
  • Date Registered: Jan 2011
  • Posts: 820
I, in one of my brighter moments in life, cut a 1/2 inch hole in the wrong place. Rather than weld the piece back in the hole, I found a 1921 English penny and made a compression patch with it. Every time I begin a project, I look at the #%*# thing and think "a penny for thought" ( I've taken poetic license). It has served me well!

Wobbler
"if you aren't living life on the edge, your just taking up space"  Thom Rock


Green Outback, Blue Revo


Ahansen_1985

  • Rockfish
  • ****
  • Location: Amity oregon
  • Date Registered: Mar 2012
  • Posts: 120
If any of you guys have holes, or cracks in your kayaks I can most likely fix them.... I work for a plastic manufacturing company... Can get whatever size needed for cheap or free, in most any material that your kayak is made of.... I can also plastic weld....
Willing to help:)


1966,351w,m5od,205....3.5" lift, 2" body, 37/13/15 boggers


Kenai_guy

  • Salmon
  • ******
  • It's not as fun if it's easy
  • Location: Kenai, AK
  • Date Registered: Jan 2012
  • Posts: 721
What if I just found someone else's yellow Hobie to drill the hole in?  Do you think the same patch method would work?
Are there any kayak shops up your way? They will usually have extra plastic that you can get for free/cheap. Cut the patch a bit bigger than your hole, and use a heat gun to weld them together.
[/quote]

Closest kayak shop is at least 3.5 hrs away, and they focus more on rafts.  So, really only what I can find on the Internet
No matter how many times the PB's tell me I'm nuts....I still smile every time I out fish them

9th place 2014 ORC
4th place 2014 Whiskey Gulch Yak Classic
1st fish ever entered & Day 1 Champion 2013 Whiskey Gulch Yak Classic


CraigVM62

  • Salmon
  • ******
  • Location: Sumner
  • Date Registered: Aug 2011
  • Posts: 579
Ditto on seeing a photo if possible.   There might be something useful  that can utilize or mount over the hole.     I don't have any high end kayaks and still cringe at the though of having a patched hole staring back at me.
I used to think that Bigfoot might exist. Then I saw the reality shows where they are looking for them.  Now I am certain they don't


jgrady

  • Lingcod
  • *****
  • Location: reedsport
  • Date Registered: Mar 2010
  • Posts: 290
yellow Plastic? Hey a Plastic bucket of kitty litter at Walmart is almost yum yum yellow.and at 11$ you can get alot of plastic to work with..


Baitman

  • Herring
  • **
  • Santa Cruz Kayaks
  • Location: Santa Cruz
  • Date Registered: May 2011
  • Posts: 39
       I had to repair the bottom of one kayak that I'd dragged for miles down a road once...  ( it slipped half off my trailer in the dead of night   :embarassed:   )           I seem to do a lot of plastic welding, it really isn't too  difficult.
    The best method I've found is to use a heat gun.   Better still if you have, or can fabricate a cone device on the end of it to focus the air stream into a small diameter of appx  1/2" .     They make heat guns designed for plastic welding, mine is a Makita model that has an adjustable temperature control.   High heat seems to work best.
     
     Fit that 2" piece that you saved  into position.  Try to use some sort of backer plate ( inside) to hold it in place while you weld it.     Duct taped cardboard ,,, or whatever, works.     After you fit that 2" circle cut out into position you will need a few slivers of  filler rod.    About 1/16 - 1/8" seem to work well, as they soften and melt quickly.   Often you can slice off pieces from around the hatch areas to use as " filler rod" using a razor knife.       It needs to be the same material, and preferably the exact same color if you want this to look good.
 
    Now to weld,,,       Apply heat into the seam at the same time adding the filler.   Be careful you don't overheat the entire area causing the whole thing to collapse...  you want just enough heat to cause the filler to bond to the joint.
  Move the heat gun into, and away from the area to prevent overheating.     Stop and let it cool a bit if you think the  whole area is getting too hot. You only need enough heat to melt the joint. 

   Next step is to cover up that ugly weld.    If it is a textured  surface, or a shiny smooth surface, the technique is the same.   You begin by heating up the weld once more to soften the weld allowing you to press it into shape.   If textured, I heat the weld joint just enough to soften it, then press a 60 grit sandpaper into it,, rubbing the weld to form it into shape.    Don't try to do the entire 2" circle, just a section of weld at a time.    For a smooth surface,  either use the back side of sandpaper, or a piece of plastic or metal,,, something that will imprint.       The important thing is to keep it CLEAN...   ;)      ( Sorry Bill ,, couldn't resist that  )    Whatever dirt touches the melted plastic will be permanent.
    Flame from a heat torch seem to burn and leave black discoloring.     I've seen guys weld using a large soldering iron,, but that doesn't leave it looking very pretty.     

    If when you are finally done and the entire area is a bit deformed ( dented )      Heat the entire area and press the dent out, holding it in shape until it cools.   

   Good luck.
  Jim


"I can’t understand why people are frightened of new ideas. I’m frightened of the old ones."
~~John Cage