Welcome, Guest. Please login or register.
June 19, 2025, 02:34:21 PM

Login with username, password and session length

Recent Topics

[June 18, 2025, 01:58:02 PM]

[June 13, 2025, 07:00:13 PM]

[June 13, 2025, 02:51:47 PM]

[June 12, 2025, 06:51:40 AM]

[June 06, 2025, 09:02:38 AM]

[June 04, 2025, 11:55:53 AM]

[June 03, 2025, 06:11:22 PM]

[June 02, 2025, 09:56:49 AM]

[June 02, 2025, 09:06:56 AM]

by jed
[May 31, 2025, 12:42:57 PM]

[May 26, 2025, 09:07:51 PM]

[May 25, 2025, 12:50:42 PM]

[May 25, 2025, 09:15:49 AM]

[May 24, 2025, 08:22:05 PM]

[May 22, 2025, 05:09:07 PM]

Picture Of The Month


Guess who's back?
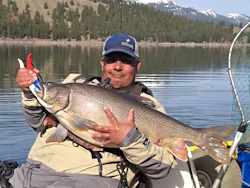
jed with a spring Big Mack

Topic: No Drill Downrigger Mount for Outback  (Read 3289 times)

0 Members and 1 Guest are viewing this topic.

crackergraham

  • Rockfish
  • ****
  • Location: Edmonds, WA
  • Date Registered: Oct 2014
  • Posts: 100
Just a quick point of emphasis before I start.  My approach to projects like this is to be very utilitarian.  I prioritize simplicity and function over asthetics (I find fish to be way more beautiful than the various implements we use to catch them).  Enjoy:)

Here is what I came up with for my down rigger setup.
Craigslist for a Cannon Lake Troll down rigger $65, line counter is on the crank (which is way easier to use than the newer models that have it at the end of the shaft near the pulley)- great deal.
Components for mount:
ABS 4" cap
ABS 4" to 3" reducer bushing
2' pc of 3" ABS Pipe
ABS glue
Small 4" x 8" cutting board with built in handle
5/16" stainless steel bolts, nuts and lock washers
5/16" stainless lag bolt
1" gray PVC threaded cap
total: approx. $30 for parts (I had the glue)
Time spent assembling the parts- 45 minute trip to Lowes, and 15 minutes at Goodwill looking for the cutting board I found (also picked up a bunch of cheap car charger cables that I've turned into gear tethers)

Tools Required:
Drill with bits from 1/8" to 1/2"
Socket Wrench set, conventional wrench
Belt Sander (3"x18")
Hacksaw for cutting 3" abs pipe


Step 1:  Mounted the base plate of the Cannon Lake Troller (CLK) to the cutting board and the 4" ABS cap with the stainless bolts.  The reason I incorporated the cutting board instead of attaching the CLK baseplate directly to the ABS is because I wanted to create an appox 2" offset rather than center the base plate over the 4" ABS cap.  That has turned out to be a great move for a couple reasons. 1. Plenty of leg clearance 2. by pushing the CLK out over the gunwale by 2 extra inches, cranking the DR ball with my left arm is very ergonomically sound... more comfortable that the right arm... though both sides can alternate quite easily to spread out the work load. (approx time for layout, drilling and bolting, 15 minutes max)

Step 2:  Glue the 4" to 3" reducer bushing into the 4" cap. (1 minute)

Step 3: Measure and cut the ABS pipe to fit snug into the 3" bushing and go all the way to the bottom of the cup holder so that the 4" cap rests snugly on the highpoint of the gunwale. (3-4 minutes)

Step 4:  Sand the 3 1/2" abs pipe down as uniformly as possible to create a 3 1/4" diameter (the diameter of the 2014 Outback cup holder) Most time consuming part of this process... and not too bad all things considered.  The 3"x18" belt sander at an 80 grit was the quickest way to take material off.  Wear a mask, don't let the ABS get too hot or it starts to melt.  Also, I used a 100 grit orbital sander to smooth out the abs.  The pipe does get thin and loses quite a bit of its strength, however when you insert it into the cup holder the reduced strength is a non issue as any tension that gets placed on it bears down on itself so it remains strong.... think trying to break an egg in the palm of your hand by squeezing all sides uniformly (approx 1 hour to sand and smooth out)

Step 5:  mount the CLT to the baseplate and test fit it for a good fishing angle.  As you see in the photos, I keep my angle pointing closer to the bow rather than perpendicular to the port side of my yak.  Again, this helps me reach the crank comfortably with both my right and left arms.  Once your angle is set... mark it so you can lag screw the 1" gray threaded cap into the bottom of the 4"cap and bushing.  This provides a brace so your down rigger can't twist out of the cup holder seat.  Figure the force that causes the blowback to your down rigger ball is the same force that could unseat the CLT from the mount.  The brace prevents it from twisting.  The tension fit of the ABS pipe keeps it from tipping.  It trolled an 8" ball at 130' deep at 1.5 mph consistently for about 4 hours and the DR stayed tight,strong and sound... even when cranking up and lowering down.  It worked! 

Anyhow, its one way to do it.  You don't have to drill your kayak at all and you don't have to have anything mounted to your yak when you're not DR fishing.  Thanks to Pmmpete and Kardinal_84 for their posts/video that helped prime the pump.
« Last Edit: December 02, 2014, 05:32:42 PM by crackergraham »
--—•—--
2nd Place 2015 Salmon Slayride
6th Place 2015 AOTY
5th Place 2016 AOTY
--—•—--


amb

  • Lingcod
  • *****
  • Location: Gresham Oregon
  • Date Registered: Jul 2008
  • Posts: 499
That looks like a really cool setup.  I've been looking for a no drill rod holder suitable for salmon trolling with no luck.  This might be a way to adapt one to my Outback.  Thanks for sharing that.  Nice work -

Alan


crackergraham

  • Rockfish
  • ****
  • Location: Edmonds, WA
  • Date Registered: Oct 2014
  • Posts: 100
Thanks Amb.  I tested it well... It works, just have to take your time with the belt sander to get a nice snug fit.  Definitely read this article too as there are some good descriptions of some of the other tasks I did to modify the DR itself.
http://www.northwestkayakanglers.com/index.php?topic=12575.msg138905;topicseen#msg138905

The revo's cup holder on the starboard side is further forward than the outback... Just not as comfortable to put it on the right side in the outback IMO.  So I went with the left. Plus I like having my rod hanging off the port.

The location for cranking is actually working out better than I anticipated too.  I didn't catch anything on my shakedown run, but I know it's just a matter of time.  Good luck to you Alan!
--—•—--
2nd Place 2015 Salmon Slayride
6th Place 2015 AOTY
5th Place 2016 AOTY
--—•—--


pmmpete

  • Sturgeon
  • *******
  • Location: Missoula, Montana
  • Date Registered: Jul 2013
  • Posts: 1989
Because Outbacks have wide flat gunwales, it would be easy to make a downrigger base which uses a gear track to attach the base to the kayak.  First, you could install a gear track in one of the Outback's trays in the area where you want to locate the downrigger:


Then, you could make a rectangle of plastic which sits on top of the sides of the tray, and could bolt the rectangle down to the gunwale using modified carriage bolts, in the manner which I described in http://www.yakfisher.net/smffiles/index.php?topic=9917.0 and http://www.northwestkayakanglers.com/index.php?topic=13167.0 .


Then all you'd need to do is to position the downrigger on the rectangle of plastic in a position where it's easy to operate, and where the cable is about an inch from the side of your kayak, and bolt the base to the rectangle with flathead bolts.  It would be an easy project.

To attach the base to the gear track, you could pull the rear bolt up against the bottom of the mount, set the mount on the edges of the tray (i.e. on top of the gunwale), slide the front bolt into the front of the track, slide the mount back until the rear bolt is in back of the track, drop the rear bolt down and slide it into the track, and then slide the mount forward to its final position.  Both bolts would remain in the base when the downrigger was off your kayak.
« Last Edit: December 02, 2014, 08:53:57 PM by pmmpete »


pmmpete

  • Sturgeon
  • *******
  • Location: Missoula, Montana
  • Date Registered: Jul 2013
  • Posts: 1989
As you see in the photos, I keep my angle pointing closer to the bow rather than perpendicular to the port side of my yak.  Again, this helps me reach the crank comfortably with both my right and left arms. 

An advantage of mounting a Cannon Lake-Troll on the left side of your kayak facing forward, as crackergraham did, is that you can turn the crank with either your left or right hand.  With the downrigger mounted on the right side of my Revolution facing forward, it’s easy and comfortable to turn the crank with my right hand, but awkward to reach over and turn the crank with my left hand.  However, if you mount a Cannon Lake-Troll on the left side of your kayak, you have to mount it far enough out so the handle doesn’t interfere with pedaling your kayak.  That apparently wasn’t a problem for crackergraham on his Outfitter, and it certainly wouldn’t be a problem on a Pro Angler, but it might be harder on a Revolution, which is a narrower kayak.

A disadvantage of crackergraham's downrigger setup is that the handle of his reel is facing away from him, which makes it harder to reel in fishing line.  The position of his reel is shown in this picture: http://www.northwestkayakanglers.com/index.php?action=dlattach;topic=14594.0;attach=24829 .  If he replaces his current Scotty rod holder with a rod holder which holds the reel below his rod so its handle is facing him, then it would be easier for him to reel in fishing line.

The tension fit of the ABS pipe keeps it from tipping.  It trolled an 8" ball at 130' deep at 1.5 mph consistently for about 4 hours and the DR stayed tight,strong and sound... even when cranking up and lowering down.  It worked!

However, because the downrigger isn’t bolted to your kayak, it would be a good idea to leash it to your kayak, so it won’t disappear into the watery depths if you flip your kayak.

Thanks to Pmmpete and Kardinal_84 for their posts/video that helped prime the pump.
Definitely read this article too as there are some good descriptions of some of the other tasks I did to modify the DR itself.  http://www.northwestkayakanglers.com/index.php?topic=12575.msg138905;topicseen#msg138905

I’m glad you found my posting helpful.  I posted a spiffed up version of that posting at http://www.yakfisher.net/smffiles/index.php?PHPSESSID=ueueinridh4mc2e1cn7otbnv01&topic=9918.0 .
« Last Edit: December 03, 2014, 08:59:02 AM by pmmpete »