Welcome, Guest. Please login or register.
June 19, 2025, 11:53:49 PM

Login with username, password and session length

Recent Topics

[June 18, 2025, 01:58:02 PM]

[June 13, 2025, 07:00:13 PM]

[June 13, 2025, 02:51:47 PM]

[June 12, 2025, 06:51:40 AM]

[June 06, 2025, 09:02:38 AM]

[June 04, 2025, 11:55:53 AM]

[June 03, 2025, 06:11:22 PM]

[June 02, 2025, 09:56:49 AM]

[June 02, 2025, 09:06:56 AM]

by jed
[May 31, 2025, 12:42:57 PM]

[May 26, 2025, 09:07:51 PM]

[May 25, 2025, 12:50:42 PM]

[May 25, 2025, 09:15:49 AM]

[May 24, 2025, 08:22:05 PM]

[May 22, 2025, 05:09:07 PM]

Picture Of The Month


Guess who's back?
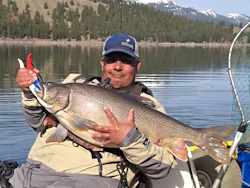
jed with a spring Big Mack

Topic: Anchor and trolley install  (Read 4562 times)

0 Members and 1 Guest are viewing this topic.

steelheadr

  • Participant in life...not spectator
  • Sturgeon
  • *******
  • Pay no attention to the man in the hat.
  • Peterberger Adventures
  • Location: obviously not fishing...
  • Date Registered: Jul 2007
  • Posts: 1865
This topic comes around regularly and I've asked questions of many of you. I waited over 6 months before I did this just to know what I wanted to do and as many options as possible. I decided to set up an anchor trolley so I can run it fore and aft, as needed.


From the trolley, I ran a line to float the spool in case a quick release was needed. This line clips through the spool and onto the anchor line.


The line then runs out to a 3lb folding anchor with 2' of 3/16 chain. The chain attaches at the top of the anchor via a zip tie that will break on a hard pull, hopefully freeing a stuck anchor from the bottom.


This is how it looks deployed.


To keep control of the anchor system, and to provide a quick release, just in case, I installed a cam cleat to keep the line at my hip and released instantly. To keep the line perpendicular to the cleat, and to minimize the chances of anything lifting the line out of the cleat, I installed a padeye just below the cleat as well. These were the only 4 holes drilled in the yak and well sealed with goop.


Thanks to Spot, Green Butt Skunked and everyone else that contributed to all this. It worked great yesterday in shallow, slow water. Now it's time to test it for real.
« Last Edit: July 28, 2008, 08:19:12 PM by bsteves »
"Fast enough to get there...but slow enough to see. Not known for predictability"  Thanks to Jimmy Buffet for describing my life...again


bsteves

  • Fish Nerd
  • Administrator
  • Sturgeon
  • *****
  • Better fishing through science
  • Location: Portland, OR
  • Date Registered: Feb 2007
  • Posts: 4584
Looks good.  I have yet to test mine in faster water yet either.

BTW..I hope you don't mind, but I shrank your photos a little.

Brian

“People say nothing is impossible, but I do nothing every day.”

― A.A. Milne, Winnie-the-Pooh


steelheadr

  • Participant in life...not spectator
  • Sturgeon
  • *******
  • Pay no attention to the man in the hat.
  • Peterberger Adventures
  • Location: obviously not fishing...
  • Date Registered: Jul 2007
  • Posts: 1865
Looks good.  I have yet to test mine in faster water yet either.

BTW..I hope you don't mind, but I shrank your photos a little.

Brian


Thanks for that. How can I do that so you don't have to?
"Fast enough to get there...but slow enough to see. Not known for predictability"  Thanks to Jimmy Buffet for describing my life...again


bsteves

  • Fish Nerd
  • Administrator
  • Sturgeon
  • *****
  • Better fishing through science
  • Location: Portland, OR
  • Date Registered: Feb 2007
  • Posts: 4584
If you add a width attribute to your image tag like the following..

Code: [Select]
[img width=600]http://....[/img]

they should just fit the page.   The other option is to use smaller images to begin with.

Brian
“People say nothing is impossible, but I do nothing every day.”

― A.A. Milne, Winnie-the-Pooh