Welcome, Guest. Please login or register.
June 19, 2025, 03:22:51 PM

Login with username, password and session length

Recent Topics

[June 18, 2025, 01:58:02 PM]

[June 13, 2025, 07:00:13 PM]

[June 13, 2025, 02:51:47 PM]

[June 12, 2025, 06:51:40 AM]

[June 06, 2025, 09:02:38 AM]

[June 04, 2025, 11:55:53 AM]

[June 03, 2025, 06:11:22 PM]

[June 02, 2025, 09:56:49 AM]

[June 02, 2025, 09:06:56 AM]

by jed
[May 31, 2025, 12:42:57 PM]

[May 26, 2025, 09:07:51 PM]

[May 25, 2025, 12:50:42 PM]

[May 25, 2025, 09:15:49 AM]

[May 24, 2025, 08:22:05 PM]

[May 22, 2025, 05:09:07 PM]

Picture Of The Month


Guess who's back?
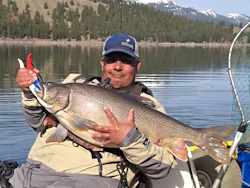
jed with a spring Big Mack

Topic: Drill holes (little ones) with confidence! Repairs are easy.  (Read 4634 times)

0 Members and 1 Guest are viewing this topic.

Low_Sky

  • Salmon
  • ******
  • Location: Anchorage, AK
  • Date Registered: Oct 2015
  • Posts: 521
Repairing screw holes in your polyethylene kayak is actually pretty easy.  Well within the skill set and budget of most of us.  So don't lose sleep over getting that accessory mount or pad eye in EXACTLY the right place the first time. 

To repair screw holes in your hull, you'll need a mini torch, some filler material and a sharp knife/fine tip scissors/side cutters. 

I use a Bernzomatic ST500T, which I picked up at the big box hardware store for $20. 

For filler material, I used some 1/8" HDPE filler rod that I had for a bigger plastic welding project.  If you want something that matches your boat, you can try the "Hobie" colored filler rods (you'll end up with a bunch of colors you don't need if you buy this), or you can probably use just about any other source of HDPE that you can fashion into something long enough to hold onto, and skinny enough to fit into the hole you are trying to fill. 

You'll want to set up the torch in "hot air blower" mode, with the flame arrestor installed, no soldering tip.  This shoots a jet of extremely hot air.  The ST500T doesn't go to 11, so I settle for 4 (max output). 

Heat the hole and the end of the filler rod at the same time, but don't let them touch.  You're looking for the plastic immediately surrounding the hole to take on sort of a shiny appearance, and for the end of the filler rod to start drooping and melting a bit.  When everything is nice and soft, kill the torch, and stick the filler rod into the hole.  I give the rod a few spins to make sure it mixes with the hull plastic.  Hold everything in place for a few seconds while the plastic cools and sets up.  Once it's solid, cut off the filler rod and use a razor blade or sharp knife to shave off any excess plastic flush with the hull. 

I used this technique to fill in some screw holes in my brand new Hobie hull, since I wanted to remove one of the mesh pockets, and didn't want to use line-snagging screws to fill the holes.

No action shots, but here is the result:
« Last Edit: March 31, 2016, 12:49:47 PM by Low_Sky »
2016 Hobie Revolution 16
2014 Perception Triumph 13


  • Location: Genesee, ID
  • Date Registered: Aug 2015
  • Posts: 61
Thanks for the write up, that's great to know.


saltykayAK

  • Rockfish
  • ****
  • Location: Alaska
  • Date Registered: Jun 2015
  • Posts: 185
Not the preferred method, but I have assisted in an emergency fix before that involved a cigarette lighter, plastic Folgers coffee can, and a cracked hull on a kayak. Definitely not perfect, but it got us through the last two days off paddling on the boundary waters canoe area.


Mojo Jojo

  • Sturgeon
  • *******
  • Suffers from Yakfishiolus Catchyitis
  • Location: Tillamook, Oregon
  • Date Registered: May 2014
  • Posts: 6073
Nice job and you can see in a closer examination that when twisted it definitely molded with the boat. I like it


Shannon
2013 Jackson Big Tuna "Aircraft Carrier"
2011 Native Mariner Propel "My pickup truck"
2015 Native Slayer Propel "TLW's ride"
20?? Cobra Fish-N-Dive “10yo grandson’s”
20?? Emotion Sparky “5 yr old granddaughter’s”


Low_Sky

  • Salmon
  • ******
  • Location: Anchorage, AK
  • Date Registered: Oct 2015
  • Posts: 521
Plenty of screw holes to be filled in a Hobie.  The screws that hold down the useless molded rod holder caps are another great candidate for removal. 

2016 Hobie Revolution 16
2014 Perception Triumph 13


INSAYN

  • ORC_Safety
  • Sturgeon
  • *
  • **RIP...Ron, Ro, AMB, Stephen**
  • Location: Forest Grove, OR
  • Date Registered: Aug 2008
  • Posts: 5417
Looks like a solid fix! 

Note, keep all the curly bits from drilling holes in your kayak.  They work awesone for repairing the same kayak.

I just renoved a RAM ball from my Revo that wasn't seeing any use. 
These were 3/16" holes.

Before, after and replaced the texture in the area to really hide them.
 

"If I was ever stranded on a beach with only hand lotion...You're the guy I'd want with me!"   Polyangler, 2/27/15


Low_Sky

  • Salmon
  • ******
  • Location: Anchorage, AK
  • Date Registered: Oct 2015
  • Posts: 521
Awesome repair, Insayn. How did you texture your holes?
2016 Hobie Revolution 16
2014 Perception Triumph 13


INSAYN

  • ORC_Safety
  • Sturgeon
  • *
  • **RIP...Ron, Ro, AMB, Stephen**
  • Location: Forest Grove, OR
  • Date Registered: Aug 2008
  • Posts: 5417
Awesome repair, Insayn. How did you texture your holes?

Heated the area up with a heat gun, and then pressed a 24 grit air tool disk, and then heated up again and pressed with 60 grit.
 

"If I was ever stranded on a beach with only hand lotion...You're the guy I'd want with me!"   Polyangler, 2/27/15


Low_Sky

  • Salmon
  • ******
  • Location: Anchorage, AK
  • Date Registered: Oct 2015
  • Posts: 521
2016 Hobie Revolution 16
2014 Perception Triumph 13


Tinker

  • Sturgeon
  • *******
  • Kevin
  • Location: 42.74°N 124.5°W
  • Date Registered: May 2013
  • Posts: 3338
Just in time!  I'm about to move a ball mount from the left to the right side...  Thanks.
The fish bite twice a day - just before we get here and right after we leave.


DTS

  • Lingcod
  • *****
  • Location: Oregon
  • Date Registered: Sep 2009
  • Posts: 372
Insayn,  great repair!  Those pictures show the repair better than in person. When I seen your kayak in person, I couldn't even tell that there had ever been any holes in it.  8)
PROGRESS IS JUST BEING THERE!


Mojo Jojo

  • Sturgeon
  • *******
  • Suffers from Yakfishiolus Catchyitis
  • Location: Tillamook, Oregon
  • Date Registered: May 2014
  • Posts: 6073
Looks like a solid fix! 

Note, keep all the curly bits from drilling holes in your kayak.  They work awesone for repairing the same kayak.

I just renoved a RAM ball from my Revo that wasn't seeing any use. 
These were 3/16" holes.

Before, after and replaced the texture in the area to really hide them.
What repair  ??? That's two different boats ::).... Obviously  ;)


Shannon
2013 Jackson Big Tuna "Aircraft Carrier"
2011 Native Mariner Propel "My pickup truck"
2015 Native Slayer Propel "TLW's ride"
20?? Cobra Fish-N-Dive “10yo grandson’s”
20?? Emotion Sparky “5 yr old granddaughter’s”


Captain Redbeard

  • Lauren
  • Global Moderator
  • Sturgeon
  • *****
  • Location: Portland, OR
  • Date Registered: May 2013
  • Posts: 3337
Thanks for the write-up. I like this method better than some of the others I've seen for hole repair - I just mean the actual physical method of putting the patch material in the hole and twisting.


anything