Welcome, Guest. Please login or register.
June 19, 2025, 03:46:34 PM

Login with username, password and session length

Recent Topics

[June 18, 2025, 01:58:02 PM]

[June 13, 2025, 07:00:13 PM]

[June 13, 2025, 02:51:47 PM]

[June 12, 2025, 06:51:40 AM]

[June 06, 2025, 09:02:38 AM]

[June 04, 2025, 11:55:53 AM]

[June 03, 2025, 06:11:22 PM]

[June 02, 2025, 09:56:49 AM]

[June 02, 2025, 09:06:56 AM]

by jed
[May 31, 2025, 12:42:57 PM]

[May 26, 2025, 09:07:51 PM]

[May 25, 2025, 12:50:42 PM]

[May 25, 2025, 09:15:49 AM]

[May 24, 2025, 08:22:05 PM]

[May 22, 2025, 05:09:07 PM]

Picture Of The Month


Guess who's back?
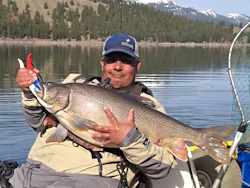
jed with a spring Big Mack

Topic: DIY Rudder Install Guide to Save $$$$  (Read 3244 times)

0 Members and 1 Guest are viewing this topic.

Krambo

  • Krill
  • *
  • Location: Portland
  • Date Registered: Apr 2015
  • Posts: 16
I just did a rudder install on my Pescador 12 where I saved a bunch of money instead of buying a $300 kit. The Pescador 12 is rudder ready with all of the moldings so if your yak doesn't have those you will have to get a bit more creative.

I started this project last Springer season because I was tired of paddling on one side to keep the boat tracking good. Initially I just installed the rudder blade and up/down lines and this did help a bit but after I got the foot controls in it was a night and day difference.

A lot of this guide is up to interpretation as far as what specific brand of Rudder you want and what foot braces you have on your Yak. Any and all comments and questions are welcome!


I started out using one of the NWKA discount codes to snag a BTS Harmony Rudder blade for around $60. If you really want to do it on the cheap you can even wait around for a good spring or fall sale.

The next item you will need is the hardware to attach the rudder. This will usually include a bracket that screws in to the stern, some round pad eyes a 2 ft. piece of bungee cord. Installing the lines to lift and lower the Rudder is a fairly straight forward process.

At the bottom of this post I'll include some helpful links that I used that detail all the how to's of the installation.

Once your rudder and lift lines are in now you can focus on the steering. You will need to find the correct foot brace tracks for your kayak. Mine had keepers so I did a search for the tracks online and only one site sold them separately from a kit for $45 before shipping.

I wanted to go even cheaper so I started calling around to kayak shops and boom! Alder Creek had a set of keepers foot brace tracks that they sold to me for $15!!!
It seems that a lot of shops will keep any hardware that they take off of Kayaks and just save it to use it on other yaks or to sell it to the DIY'er. It will take more time to find all the parts you need but you will save a lot of money.

Installing the tracks is super easy. Just take off the existing foot braces and replace them with the tracks using the same hardware.

Now for the cables. Time for a trip to the hardware store. A word of warning....bring a list with you!!! I think I made about three trips because I would forget one thing or the other. You will need...

-Small diameter steel cable. Length will depend on your Kayak

-Plastic Tubing. Same amount as cable.

-Hardware to attach cable to Rudder. You can do this a number of ways depending on what is at the store. I've attached a pic below showing what I used.

-Hardware to attach cable to foot braces. Probably just ferrules unless you get super creative. Note: Get two ferrules per attachment site. The second one is used to cover up the tag end of the cable. You can even get some shrink tubing to put over them for an extra layer of protection.

-Silicone Sealant. To seal up the cable holes you will drill.


Next step is to drill. I used a drill bit the same outside diameter as the tubing. Just give it a couple of widening circles to make the hole a tad bigger. I liked going this route because I was able to get a super tight fit and thus less leaks.

Starting from the stern, feed the tubing through to the hole by the foot brace making sure to keep to the outside of the scupper holes.

Next you can either just trim up the tubing, use cable stays, or even mushroom out the end of it using a lighter or heat gun. The idea is to make sure the tubing does not get pulled back through the holes. Since I had such a tight fit I didn't do any of this. I'm planing on just sealing around the tubing with silicone.

Next, feed the cables through and adjust the length before you trim and crimp. The links I provided below show a really good way to make sure you correctly adjust the cables.

And that's that!!  Here is a break down of the costs...

Rudder    $60
Tracks    $15
Padeyes  $5
Bungee   $2
Bracket   $5
Cable      .40/ft  22 ft. 
               $9

Tubing    .15/ft 22 ft.
               $3

Hardware $15

Total:   $114!!!!! 

I took it out to Sellwood yesterday for some trolling and it worked like a dream. I'll do any updates if I run into any problems down the line.

Thanks for looking.


Links.

Great PDF detailing the lift lines.
http://www.oceankayak.com/uploadedFiles/Website_Library_Assets/Files/Installation_Instructions/prowler13_rudder.pdf

Video detailing entire process. I used this one mainly to adjust the cables before making the final crimps.


Photos.


anything