Welcome, Guest. Please login or register.
June 19, 2025, 03:59:04 AM

Login with username, password and session length

Recent Topics

[June 18, 2025, 01:58:02 PM]

[June 13, 2025, 07:00:13 PM]

[June 13, 2025, 02:51:47 PM]

[June 12, 2025, 06:51:40 AM]

[June 06, 2025, 09:02:38 AM]

[June 04, 2025, 11:55:53 AM]

[June 03, 2025, 06:11:22 PM]

[June 02, 2025, 09:56:49 AM]

[June 02, 2025, 09:06:56 AM]

by jed
[May 31, 2025, 12:42:57 PM]

[May 26, 2025, 09:07:51 PM]

[May 25, 2025, 12:50:42 PM]

[May 25, 2025, 09:15:49 AM]

[May 24, 2025, 08:22:05 PM]

[May 22, 2025, 05:09:07 PM]

Picture Of The Month


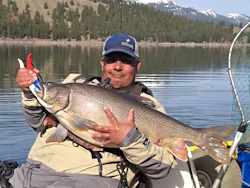
Guess who's back?
jed with a spring Big Mack

Topic: penn 500 jigmaster rebuild ... courtesy of Alan Tani  (Read 6195 times)

0 Members and 1 Guest are viewing this topic.

polepole

  • Administrator
  • Sturgeon
  • *****
  • NorthWest Kayak Anglers
  • Location: San Jose, CA :(
  • Date Registered: Apr 2006
  • Posts: 10099
There's been some talk of reel rebuilds lately and Alan Tani's name has been brought up as a source of good info.  I sent Alan an email asking for permission to re-post some of his work and he graciously granted permission.  Here's a Penn 500 rebuild tutorial than was posted on NCKA a while back.    Many of the other Penns I've seen mentioned here are similar so hopefully this helps some of you all.  It looks like Alan has signed up here as well.  Let me know if there are specific reels you are interested in and I'll see if there are other tutorial's I can report here.

-Allen

******************************


i'm not trying to make you feel, um, " g - u - i - l - t - y ....', or anything, but i know you have one of these reels.  i can tell by the way you shuffle your feet.  c'mon, it's not that bad.  we've all had one of these reels before.  it might have even been your first.  there's no reason to be embarassed about owning a jigmaster.  it was once considered to be one of the best reels on the market.  it can be once again. 

here's a link to the schematic....

http://www.scottsbt.com/catalog/store/category1.aspx?SID=8&Category_ID=5900&ClearCache=1

and here is your old friend. 


did you ever wonder that this little screw was for?  back out this take apart thumb screw (key #42), lift the screw up slightly, and twist the entire right side plate counterclockwise.  it comes right off!


you now have three pieces.


let's grease the left side plate screws (key #32 and 39).  back out each one, one at a time, grease the screw hole and zip the screw back in. 


apply grease to the click tongue (key #35) and click spring (key #62).  add corrosion x to the left side bushing (key #40).


back out each one of the right side plate screws (key #31 and 38), one at a time, grease the screw holes, and zip the screws back in. 


grease the inside of the left side ring and wipe off the excess.


re-install the spool and set the assembly aside.


now for the right side plate assembly.


remove the handle lock screw (key #23a), the handle screw (key #23), the handle (key #24) and the star drag wheel (key #10).


back out the four bridge screws (key #16 and 17) but leave them in place!!!!!!


the bridge assembly is now loose underneath.  imagine your hand is a small crane.  lift the right side plate (key #1) straight up, move it straight over to a safe place, and set it straight down without tipping it over.  resist the temtation to look underneath.  for now....


carefully line up all the components of the drag stack and bridge assembly. 


ok, now it's decision time.  on the right, you see a brand new stock brass gear sleeve ($6).  on the left is a brand new pete kolekar stainless steel gear sleeve ($15).  in the middle is the original stock brass gear sleeve and it's trashed!  i only recommend a stainless steel gear sleeve if you INTEND to exceed 8 pounds of drag.


here's how the trashed gear sleeve fits in the handle.  you can see how much play it has.


here's the new brass gear sleeve.  not to bad, but there's still a little play.


here's the stainless steel gear sleeve.


using a small punch, remove the brass retaining pin.


pull the old gear sleeve, clean up the the bridge and lube it up with corrosion x.


install the new gear sleeve and retaining pin.


done.


i like to replace the fiber washer (key #4) with the drag washer from the black side plate penn 4/0 senator 113.  this drag washer (part #6-113) has the same inner and outer dimensions as the long beach washer (part #6-60), but it's thicker.  i use this washer under the gears of many reels using the jigmaster gear sleeve (part #98-60). 


grease up the rest of the drag washers and install them with the metal washers.  make sure the metal washers are alternating "slotted - keyed - slotted."


because the #6-113 drag washer under the gear is thicker than the stock fiber washer (key #4), i usually discard the tension spring (key #8). 


now, your side plate is still sitting there, quiet and undisturbed. 


cover the bridge screws with your left index and middle fingers so the screws do not fall out.


ok, NOW you can look at the guts of the side plate.


remove the pinion gear (key #13), lube the right side bushing (key #26) with corrosion x, and put the pinion gear back.


the bridge/main gear assembly goes straight in.  no muss, no fuss.  pinch everything together, zip down the four bridge screws and you're done!!!!!!!!!!!


did you say something?

huh?  what was that?  what accident?  what do you mean, you had a little accident?  how many pieces?


ok, look, it's not that bad.  first, let's line everything up.  see, that looks better already!


first is the eccentric (key #19) and eccentric spring (key #20).


grease it up a little and stick it back in the hole.


stick the eccentric lever (key #21) back on....


and bolt it down with the eccentric screw (key #22).


stick a screwdriver blade under the spring to lift it up a little, then grab it with the needle nose pliers. 


crank the tip of the spring HARD and stick it into the slot of the side plate.  the lever should now snap back and forth sharply.


now for the bridge screws (key #16 and 17).  note that two are threaded all the way up and down, and two are threaded only at the end.  the clutch springs (key #18) ride up and down on the bridge screws with the short threads.


short threads on top, long threads on bottom.


two fingers over the bridge screws, flip over the side plate and install the clutch springs (key #18).  oh, and lube the right side plat bushing (key #26) if you haven't already.


install the pinion yoke (key #12) and the pinion gear (key #13) as a unit.


shimmy the eccentric jack into position.  you may need needle nose pliers to snap it into position.


make sure the dog (key #15) and dog spring (key #14) are in proper position. 


snap it together.


bolt it down.  take a moment now to make sure the free spool lever and anti-reverse mechanism work. 


install the spacing sleeve (key #9).


install the star drag wheel (key #10) and screw it down as far as it will go.  don't skip this step. 


install the handle (key #24) and handle screw (key #23).  turn the handle screw down until it seats, the crank it around HARD until the handle screw has rotated one or two slots and line up the slot with hole for the handle lock screw.  now install the handle lock screw (key #23a).


line up the side plate with the left side plate ring, push the side plate down, then turn it clockwise until the take apart thumb screw "clicks."  turn the screw down and you're done!  congratulations.!


see, that wasn't so bad......


anything